• Skip to primary navigation
  • Skip to main content
  • Skip to primary sidebar

BladeReviews.com

Knife Reviews

Menu
  • Home
  • Reviews by Brand
    • Al Mar Knives
    • Benchmade Knives
    • Boker Knives
    • Buck Knives
    • Cold Steel Knives
    • Chris Reeve Knives
    • CRKT Knives
    • DPx Gear
    • Emerson Knives
    • ESEE Knives
    • Fällkniven Knives
    • Fantoni Knives
    • Gerber Knives
    • Great Eastern Cutlery
    • Hinderer Knives
    • Hogue Knives
    • Ka-Bar Knives
    • Kershaw Knives
    • Kizer Knives
    • LionSteel Knives
    • Mcusta Knives
    • Mora Knives of Sweden
    • Microtech Knives
    • Ontario Knives
    • Opinel Knives
    • Reate Knives
    • Rockstead Knives
    • Schrade Knives
    • Shirogorov Knives
    • Smith & Wesson Knives
    • SOG Knives
    • Spartan Blades
    • Spyderco Knives
    • Steel Will Knives
    • Strider Knives
    • Victorinox Knives
    • Viper Knives
    • Zero Tolerance Knives
    • Close
  • Reviews by Purpose
    • EDC Knife Reviews
    • Tactical Knife Reviews
    • Survival Knife Reviews
    • Hard Use Folding Knives
    • High End Pocket Knives
    • Gentleman’s Folders
    • Rescue Knives
    • Traditional Knives
    • USA Made EDC Knives
    • Close
  • Reviews by Class
    • Folding Knives
    • Fixed Blade Knives
    • Assisted Opening Knives
    • Automatic Knives
    • Machetes
    • Titanium Frame Lock Knives
    • Close
  • Best Of
    • The Best EDC Knives
    • Best Survival Knives
    • Best Tactical Knives
    • Best High Value Knives
    • Close
  • Gear Reviews
    • Flashlight Reviews
    • Multi-Tool Reviews
    • Watch Reviews
    • Knife Sharpener Reviews
    • Close
  • FAQs
    • Knife Care and Maintenance
    • Knife Dictionary
    • Knife Steels
    • Steel Composition
    • Interviews
    • Close
  • Contact
  • About
    • About
    • Privacy
    • Links
    • Close

Sharpening and Maintenance Products

DMT Double Sided Diafold Sharpener Review

by Dan Jackson 2 Comments

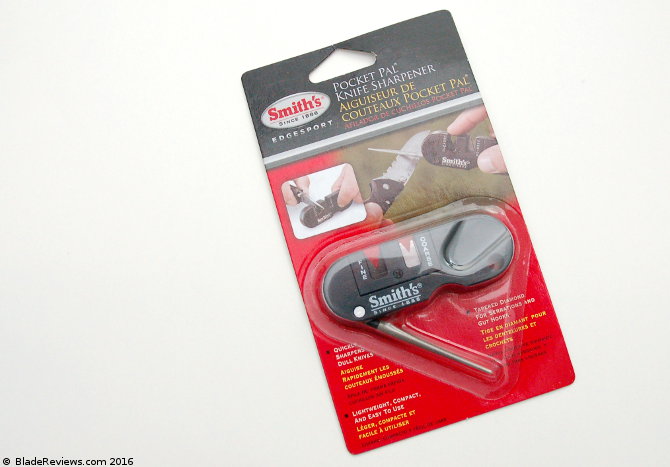
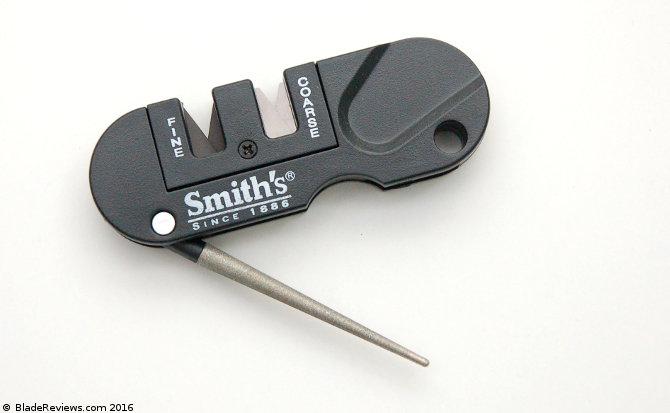
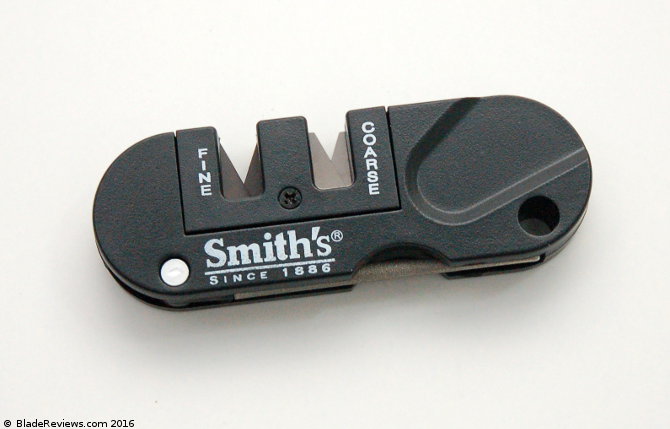
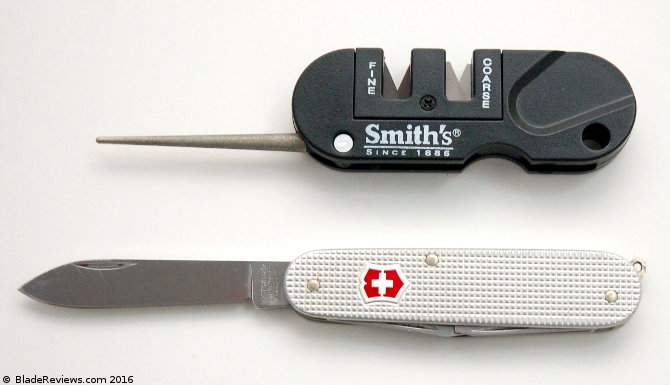
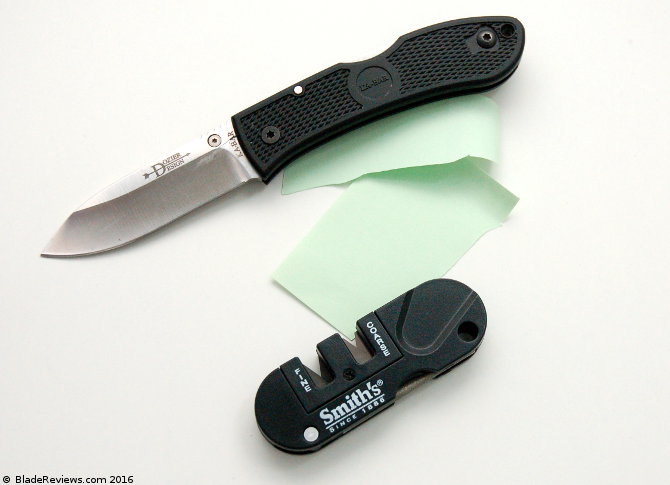
Ever since I reviewed the Smith’s Pocket Pal PP1 I’ve been wanting a portable sharpener. Some people refer to these as “field sharpeners,” but since I don’t spend much time in the field, I’ll just say I want something simple, small, and portable. Something that works when space is at a premium. And something durable.

DMT Diafold
Buy the DMT Diafold at BladeHQ

Buy on Amazon

DMT is the gold standard in diamond sharpeners, and I’d yet to review one, so this little Diafold sharpener seemed like an obvious choice. It’s inexpensive, unobtrusive, yet it folds out into something large enough to use regularly. I picked one up without thinking too hard about it, and used it for several months.

What You Get

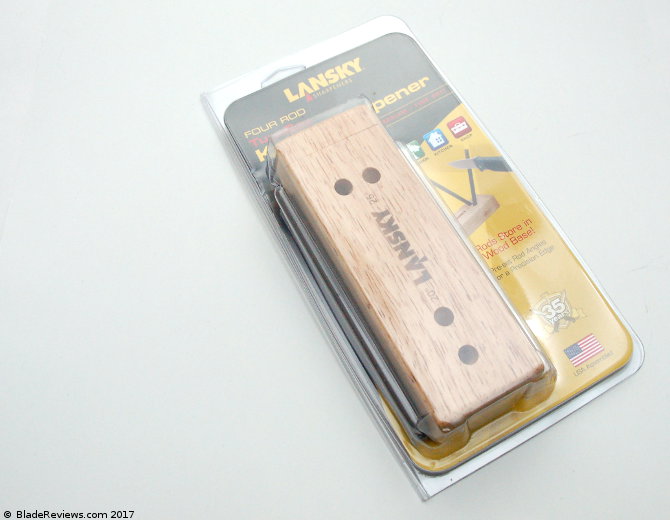
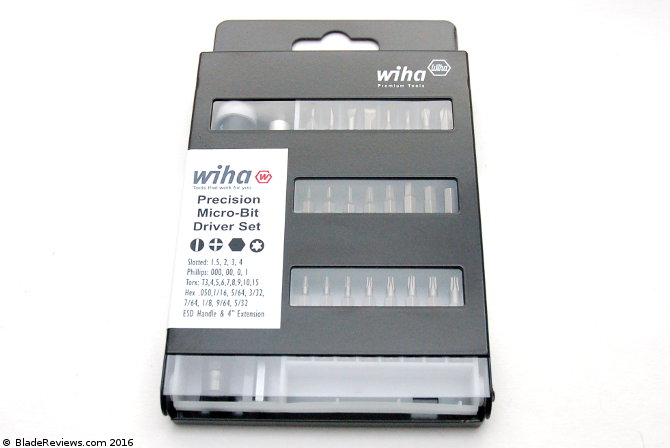
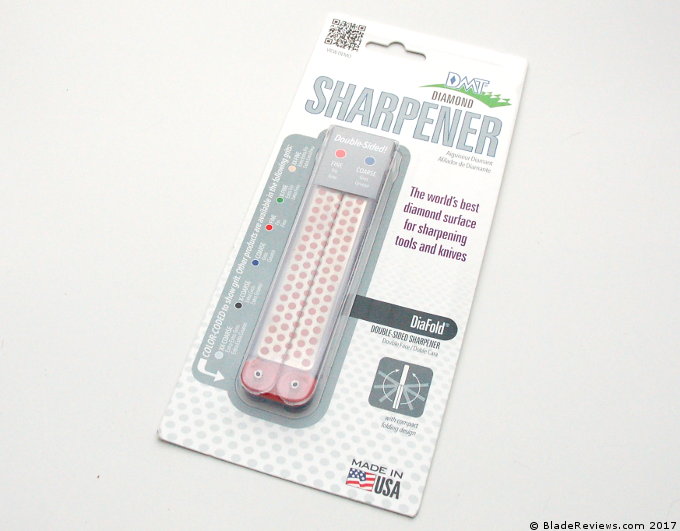
The Diafold comes in an annoying thick plastic clam shell pack. Thankfully my Wingman has a cutter designed just for this occasion, so I was able to get at the Diafold without too much trouble. Inside is the sharpener. The instructions are outside. Pretty basic stuff.

DMT Diafold

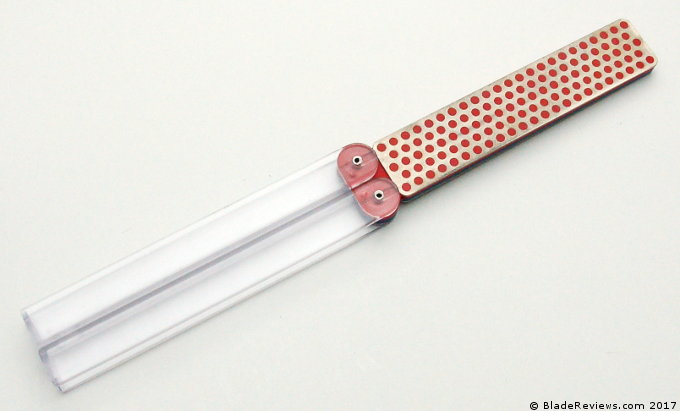
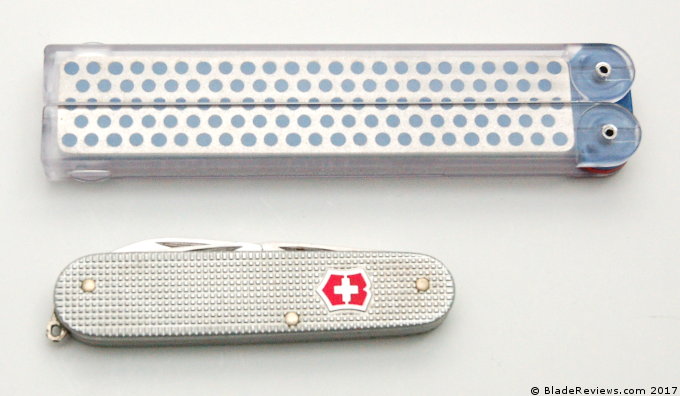
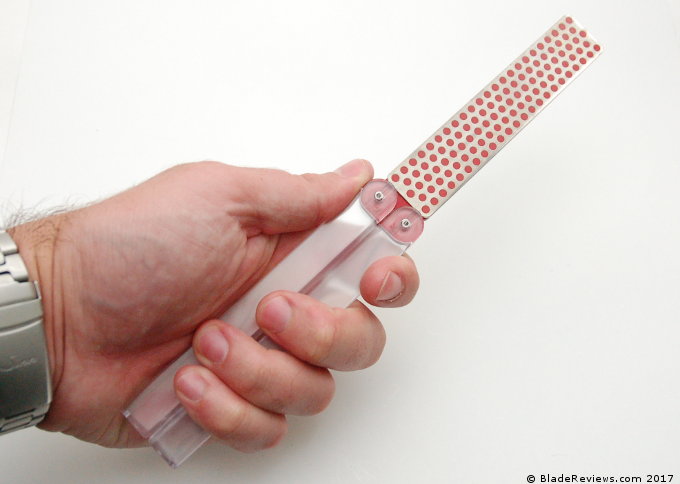
Closed the Diafold is 5″ long by about an inch wide and half an inch thick. The stone itself is 4.33″ x .875″ x .25″ and is encased in two clear rotating plastic arms. It’s like a balisong, although the chance of stabbing yourself is lower and the flipping action leaves something to be desired.

DMT Diafold

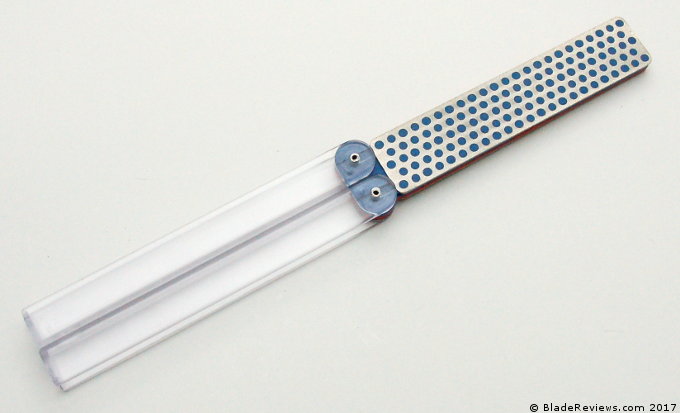
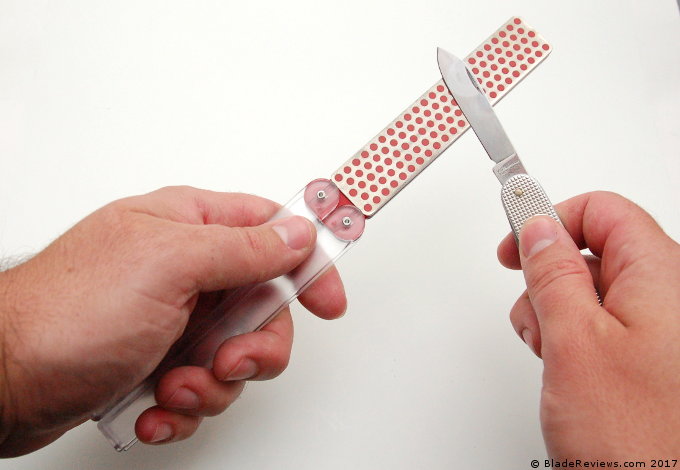
When opened the Diafold stretches out to 9 1/2″. This give you plenty to grip onto as you sharpen your knife.

Use

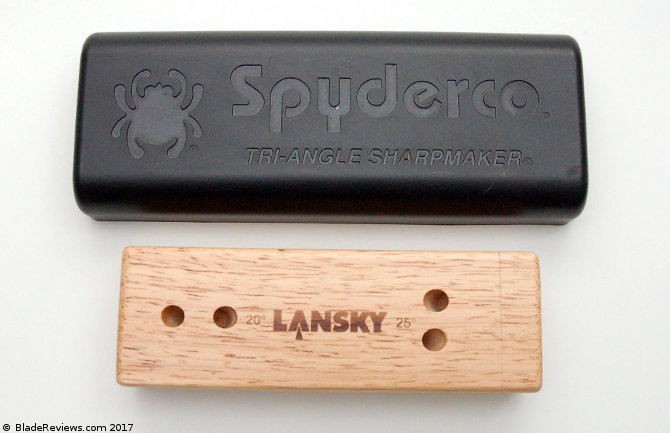
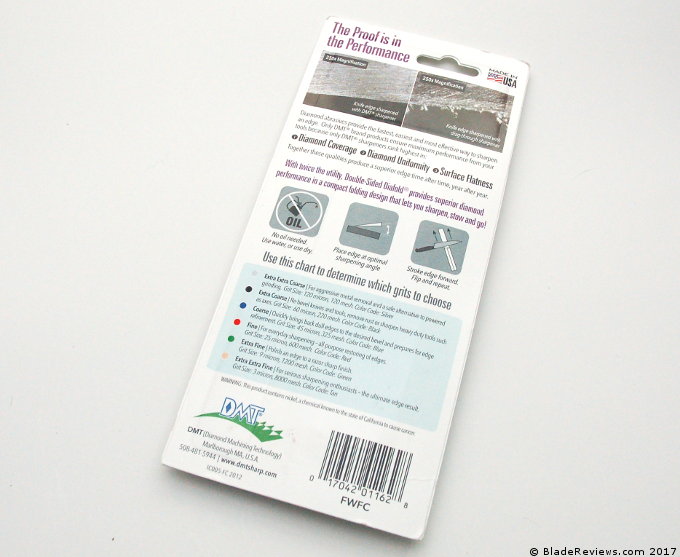
DMT offers the Diafold in their entire range of sharpening grits: everything from extra-coarse to extra-extra-fine. I selected a coarse and fine grit. I figured the coarse side would be enough to work chips out of blades, while the fine side would leave me with a good working edge. I thought it complimented my Sharpmaker nicely, since I never opted for the diamond stones for that system.

DMT Diafold

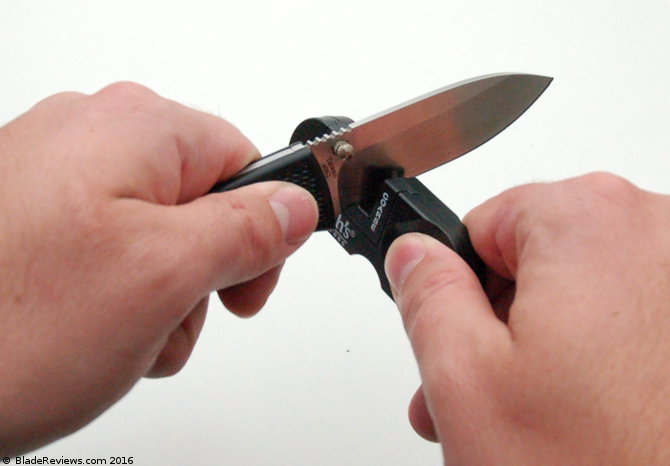
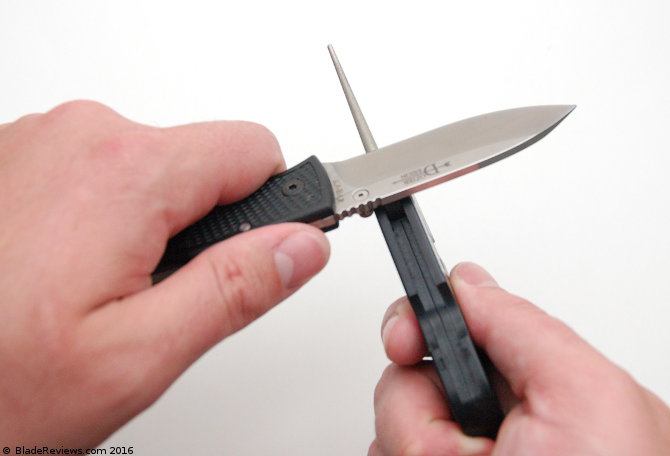
Turns out I made a good choice, as I can use this to bring pretty much anything back to life. While I’m not a professional freehand sharpener, I’ve had a few years of practice now. I can use this tool to get a hair shaving edge on most of my folding knives. It will be impossible for recurves, and I can’t say I’ve tried it on anything like ZDP-189, but it’s great for my EDC rotation, which features a lot of 154-CM, S35VN, S30V, and VG-10. No issues with any of those steels.

DMT Diafold

Typically I use this DMT stone without any lubricant, but if you wanted to you could put some water on it. I find a light touch is the way to go with diamond stones. Too much pressure and you risk scraping off all the diamonds. Light even pressure and flipping the blade over every few strokes is the way to go. It won’t take much work with diamond stones to get the desired effect. Let the stones do the work and you are good to go.

DMT Diafold

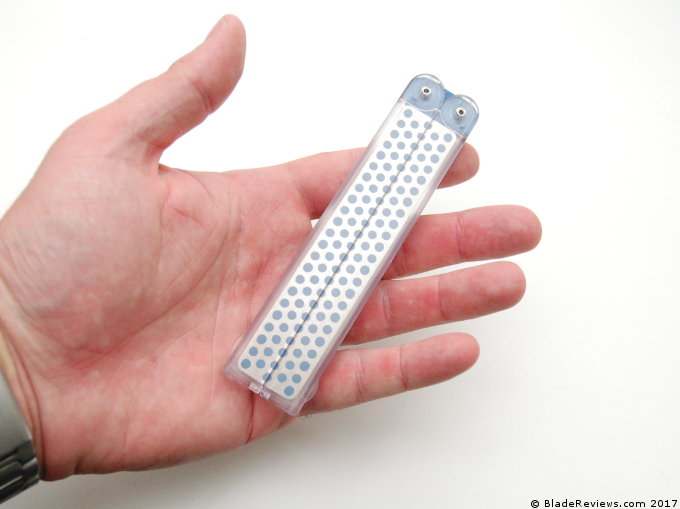
I like how the Diafold folds up into a compact package. I haven’t gone on a hunting trip, or even an extended hike with this sharpener, but it’s lightweight, relatively small, and folds up flat. It easily tucks into a pocket or bag. I suppose you could buy something even smaller, but personally I like having a sharpener big enough to use comfortably.

DMT Diafold

That said, my Diafold spends most of it’s time on my desk. It’s convenient, self contained, and doesn’t take up much space. Most of the time I don’t need anything bigger than this to sharpen my knives.

DMT Diafold Review – Final Thoughts

This is one of my shorter reviews, but that’s not a bad thing. The Diafold is super simple, and equally effective. I paid about $25 for mine on Amazon, which seems kind of spendy for a small simple sharpener, but it’s worth the money to me. DMT makes the best diamond stones in the business and this Diafold is nicely put together. And it’s made in the USA. You get what you pay for. Let’s put it this way, I’d definitely take this Diafold over 5 of those Smith’s Pocket Pals.

DMT Diafold

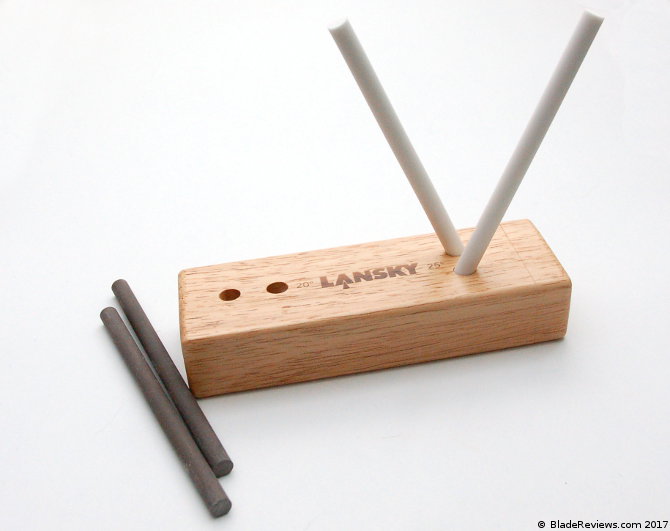
I am considering picking up the extra-fine / extra-extra-fine version too just to see what kind of edge I can get, but I don’t regret the coarse/fine combo. That will be the way to go for most people, but if you buy a couple of them you are looking at a little over $50. About the price of a Sharpmaker. It won’t sharpen serrations or recurves like a Sharpmaker, but it also won’t shatter like a Sharpmaker rod will if you drop it on the kitchen floor. Don’t ask me how I know. If you take care of these DMT stones they should provide many years of service.

I recommend this sharpener to pretty much anyone. I think I found my “field” sharpener, but this type of sharpener intrigues me. I never got in to the big table top sharpeners like the Wicked Edge or Edge Pro. I’d be curious to hear if anyone has a field sharpener they prefer over the Diafold. It might become the subject of my next sharpener review.

Sale
DMT FWFC DuoSharp Double-Sided Diamond Sharpening Stone for Knives and More, 8-Inch, Fine/Coarse, White
  • Diamond Knife Sharpener: Offering 2-stage sharpening and a compact design, this lightweight DMT diamond sharpening stone is great for the home, camper, tool box, gardening shed, and more
  • Dual-Diamond Stone Surface: Specialized fine diamond (25 micron / 600 mesh) hones any blade or chisel to a razor-sharp edge; Specialized coarse diamond (45 micron / 325 mesh) quickly restores neglected edges
  • Portable Knife Sharpeners: Compact, lightweight pocket knife sharpener features convenient fold-and-go handles, which enclose and protect the diamond plate when not in use; Measures 9.5 inches open and 5 inches closed
  • Fast & Easy: A micronized monocrystalline diamond surface sharpens edges faster and easier than conventional sharpening stones; No messy oils are needed either — sharpen lapping plate dry or with water
  • Made In The USA: Preferred by professionals for their superior quality and versatility, our durable diamond sharpening stones are built to provide years of consistent performance and reliable service
$26.79 Amazon Prime
Buy on Amazon

I recommend purchasing the DMT Diafold at Amazon or BladeHQ. Thanks for reading.

Filed Under: Made in the USA, Sharpening and Maintenance Products

How to Sharpen Hair Clipper Blades

by Dan Jackson 50 Comments

This post came out of a desire to solve my own problem. I have some Oster Fast Feed hair clippers, and the blades became dull after a while. I spent $50+ on these clippers, so I wasn’t about to throw them away. They sell replacement blades, but at almost $20 they seemed awful expensive. I wanted to figure out how to sharpen the existing blades.

How to Sharpen Hair Clippers

After spending half an hour combing through the dregs of YouTube and Google I had yet to find a simple, no B.S. article on how to sharpen hair clippers written by someone who actually knew what they were talking about. Plenty of shill sites were willing to serenade you with articles barely written in English, and plenty of people on YouTube were willing to fumble around for 10-20 minutes trying to explain this simple process. Neither of those experiences left me feeling good.

Eventually I was able to figure it out, and I wanted to pay it forward by putting together this quick guide.

So I apologize to my regular readers if this is outside our normal programming, but the article does involve sharpening things, and Japanese water stones, so it sort of fits the theme of the site. Maybe you will find it useful or mildly entertaining. And don’t worry, I won’t be reviewing hair clippers any time soon…

Without further adieu, I present my no-nonsense guide to sharpening hair clippers:

What You Will Need

You won’t need much to sharpen your clippers. Here’s a bulleted list so you don’t forget anything:

  • Some Dull Hair Clippers; (In this article I sharpen a set of Oster Fast Feed clippers.)
  • A Phillips Screw Driver;
  • A Cleaning Brush;
  • A Bench Stone; (I use King Whetstones, but any set will do.)
  • Clipper Oil; and
  • A Rag.

The most important piece of equipment will be your sharpening stone. I used Japanese water stones, because those are the bench stones I have, but you could easily substitute in a diamond stone or Arkansas stone. Heck, you may even be able to use super fine wet sandpaper.

Removing Clipper Blades with Screwdriver

I will say that the water stones work great for this. I have a set of King 1000 grit and 6000 grit stones and they are perfect for the job. If you use water stones like I did, you obviously need to soak them before you start. If you have a diamond or Arkansas stone you may want to hit them up with a little lubricant before starting.

Disassemble Your Clippers

Now that you have everything you need to get the job done, carefully take your clippers apart with a Phillips screw driver. There are 2 blades to a set of clippers, so pull those both off and clean them. Now would also be a great time to clean out your clippers with a brush.

Disassembled Clipper Head

Sharpen the Blades

You will want to sharpen the flats of both the top and bottom blade. This is easy to do, and is much easier than sharpening a knife. The arrows in this picture point to the flats I am talking about:

Clipper Blade Flats

The trick is to lay the blade flat on the stone, and run the blades back and forth along the stone with gentle pressure. It should not take much to sharpen your blades. I would suggest 10 passes along the stone.

Make sure you keep the flats of the blades flat on the stone. The only way to screw this up is if you don’t keep the blades flat. Some people use a magnet as a handle. That’s a next level clipper sharpening move. I’m not that sophisticated. Thankfully if you don’t have a special magnet your thumbs and index fingers will work fine.

Sharpening Clipper Blades

I sharpened my blades on my 1000 grit stone, and then polished them on the 6000 grit stone because I had it handy. I don’t think you need a super fine stone to get a decent result, but it doesn’t hurt.

Sharpening Clipper Blades with a Fine Waterstone

It should take only a minute or 2 to sharpen the blades. I ended up taking 5 minutes because I was trying to snap some pictures while I sharpened. The actual sharpening is super easy.

Clean and Oil the Blades

Once you have sharpened your blades you will want to clean and oil them prior to reassembly. I used a little soap and water to clean my blades, but rubbing alcohol wouldn’t hurt. I then oiled my blades down to prevent rust, and blotted away the excess oil.

Oiling Clipper Blades

Reassemble Your Clippers

This is probably the trickiest part of the process. When you reassemble your clippers you will want to take the time to make sure you have the blades lined up properly. The blades are sharp so be careful.

I don’t tighten the blades down all the way until I am sure I have everything adjusted the way I want. Once you have your blades dialed in add a drop of oil to the blades, and then fire up your clippers before you start cutting hair to make sure everything was put back together properly.

Sharpening Hair Clippers – Final Thoughts

Cutting hair with dull clipper blades is no fun. They don’t cut cleanly, and will sometimes pull hair. It’s just like trying to use a dull knife. I use my clippers once a week or so, and end up sharpening about once a year. I’d be curious to hear how often professional barbers sharpen their clippers.

I hope this article helps some people. Don’t be intimidated by this if you are new to sharpening things. Sharpening clippers is easy to do and you will immediately be able to tell the difference after sharpening.

A good bench stone will make a big difference here. You want something that won’t move while you are trying to sharpen, and a stone that is wide enough to accommodate your clippers. If you don’t already have a good bench stone, I’d recommend the investment. The King stones I used in this article are inexpensive, and they will last most people a lifetime. Plus, if you learn how to freehand sharpen you can also use the stones for your kitchen and pocket knives.

Filed Under: Sharpening and Maintenance Products

Lansky 4-rod Turn Box Crock Stick Sharpener Review

by Dan Jackson 12 Comments

I have long been an advocate for the Spyderco Sharpmaker. If you are looking for a simple high quality knife sharpener, I am still convinced that it is a great option. I have had mine for 5+ years, and continue to use it on a weekly basis.

Lansky Crock Sticks Review
Buy the Lansky Crock Sticks at BladeHQ

Buy on Amazon

However, at $50+ at retail, the Sharpmaker isn’t an inexpensive option. I am sure some people just getting into knives and sharpening would prefer a cheaper starting point. I’ve played around with the ultra low budget pull sharpeners, and I would not recommend these unless you were looking for a backup sharpener and wanted to sharpen inexpensive knives.

So the quest for an inexpensive knife sharpener continued, and the Lansky Crock Sticks intrigued me. It’s a similar setup to the Sharpmaker, but for under $15 it is a fraction of the cost. Does it work? How does it compare to the Sharpmaker? These were some of the questions I had going into the review.

What You Get

The Crock Sticks come in a simple clear plastic clamshell package. Inside you have the wood box, which performs double duty as your carrying case and base, 2 medium grit ceramic rods (brown), and 2 fine grit ceramic rods (white).

Lansky Crock Sticks

The box is 2 pieces of wood held together with a screw. Turning the small end cap reveals the ceramic rods. It’s a simple system, but it works.

What I like about this system is that it is simple and compact. It’s smaller than the Sharpmaker and more simple.

Use

The Crock Sticks have 2 sets of holes for 2 edge angles: 20 degrees and 25 degrees. I have most of my knives set at a 40 degree inclusive edge thanks to the Sharpmaker, so that is what I stuck with with my Crock Sticks.

Lansky Crock Sticks

Set up is dead simple. Remove the sharpening rods from the box and set them into the base. You are now ready to sharpen. Just like with the Sharpmaker, the trick is to put the system on a flat and level surface, and then hold the knife perpendicularly to the base. Gently run the edge down one of the rods, and then run the edge down the other side. Make sure you are sharpening from heel to tip, and be careful not to pull the tip “over” the rod as you finish your stroke. Do 10-15 passes per side on the brown medium rods and then repeat the process with the white fine rods.

Lansky Crock Sticks Wooden Box

I have tested my crock sticks over the past few months on a number of folding and fixed blade knives. I have found this works great for basic steels and knives that don’t need to be reprofiled. The ceramic rods work well, but you need something more aggressive for re-profiling or repairing a chipped edge. Lansky does offer a version of the Crock Sticks with diamond rods, much like how Spyderco offers diamond rods for the Sharpmaker. The diamond set costs an extra $10 and I haven’t had a chance to check them out yet.

The nice thing about a rod system like this is that you can also sharpen serrations. You can free-hand sharpen individual serrations with the rod, or you can sharpen both sides of the serrations by sharpening the knife just like you would a plain edge (on both sides with the stones in the base).

Since the sharpening rods are made of porous ceramic, you will need to periodically clean the rods to remove built up metal shavings from the ceramic. I use Bar Keepers Friend for this, but any kind of powder cleaner like Ajax will work.

Lansky Crock Sticks vs. Spyderco Sharpmaker

I am guessing that some readers will want some guidance on whether to buy the Crock Sticks or Sharpmaker. Since the Sharpmaker is 3-4x more expensive than the Crock Sticks I think it’s a valid question.

Lansky Crock Sticks vs. Spyderco Sharpmaker

I actually like these Crock Sticks quite a bit, and think that most people will get a lot of value out of these. The biggest trade off I can see is that the sharpening rods on the Crock Sticks are shorter than the Sharpmaker. This will make it harder to sharpen bigger blades.

There may be some advantage to the triangular stones on the Sharpmaker, but practically speaking I’m not sure I notice a difference. With that said, my Sharpmaker is 6 years old, and I’ve owned my Crock Sticks for maybe 6-8 weeks now.

Lansky Crock Sticks vs. Spyderco Sharpmaker closed

The Sharpmaker remains the gold standard, but I like these Crock Sticks. Especially at the price point. The Crock Sticks work. If you are just getting started in the hobby or simply want to save money I think you can easily get away with a set of Crock Sticks. If you are into sharpening then my guess is you will eventually want to upgrade to a SharpMaker.

Lansky Crock Sticks Review – Final Thoughts

For under $15 I should have bought a set years ago. These work great for small knives with “regular” steel. This wont be the best fit for a dull S110V blade, or a thrashed machete, but it’s perfect for maintaining small EDC knives with steel like AUS-8, 1095, 154CM, S35VN, CTS-XHP, etc. It is a small and portable system that tucks away into a tool box or kitchen drawer and is dead simple to use.

Lansky Crock Sticks

The Crock Sticks strikes me as a great gift option for someone as well. Knife guys take this for granted, but being able to sharpen your knives is empowering. It breathes new life into tools and enhances your work, whether that is in the kitchen or on the job. For well under $20 you can give this to someone and they can sharpen a knife in 5 minutes with minimal skill or instruction. That’s pretty cool and I can’t say that about any other sharpener I have reviewed. This would be a nice gift for a friend or family member that wants to be able to sharpen knives casually.

I highly recommend the Lansky Crock Sticks. This is a low cost alternative to the Spyderco Sharpmaker that gives you 90% of the utility at a fraction of the price.

Sale
Lansky Ceramic Turn Box 4-Rod Knife Sharpening System - LCD5D
  • Intuitive to Use: Many find the conventional knife sharpening stone difficult to use, but with this blade sharpener, you can easily maintain a consistent angle simply by moving your knife straight down along each knife sharpening rod.
  • Portable: Many knife sharpeners can be difficult to transport, but this Lansky knife sharpener kit fits neatly within its compact wooden case. A professional knife sharpener is great, but it isn't always convenient. This knife sharpener tool allows you to restore a razor-sharp cutting edge on the go! When you're done, store it in your toolkit, kitchen, car, or backpack.
  • Dual Grit: This pocket knife sharpening kit provides two gray course grit ceramic sharpening rods for establishing a bevel on a dull blade and two white fine grit ceramic honing rods to hone your edge. This allows for a 2-stage sharpening process in one system.
  • Multiple Options: This pocket knife sharpening tool boasts two set angles: 20 degrees and 25 degrees. Use the more acute angle for kitchen knives and fillet knives and the more obtuse angle for pocket knives and utility knives.
  • All-in-One Package: This ceramic knife sharpener kit features everything you need to turn your dull knife into a razor-sharp one.
$21.00
Buy on Amazon

I recommend purchasing the Lansky Crock Sticks at Amazon or BladeHQ. Please consider that purchasing anything through any of the links on this website helps support BladeReviews.com, and keeps the site going. As always, any and all support is greatly appreciated. Thank you very much.

Filed Under: Misc. Gear, Sharpening and Maintenance Products

Smith’s Pocket Pal PP1 Review

by Dan Jackson 16 Comments

I suspect that the Smith’s Pocket Pal has fallen into the shopping basket of many an unassuming knife collector. For starters, at under $10 the barrier to entry is low. And knife sharpening can be intimidating to some, so the promise of easy, trouble free knife sharpening probably also has its draw. And then there is the size. It’s smaller than most closed folding knives, and lives up to its namesake. At least somewhat. It’s pocketable for sure, but is it worth pocketing?

Smith's Pocket Pal PP1 Review

Buy on Amazon

I have had strong apprehension to pull sharpening systems for a long time now. The idea of dragging a knife through a channel of carbide bits never appealed to me. Fundamentally I didn’t think these kinds of sharpeners worked. Traditionally, when you sharpen a knife you push the edge across your sharpening material, as if you were cutting into it. That makes sense, because in effect you are wearing steel away, refining and polishing the edge. You don’t drag your blade through the sharpening medium like some sort of bizarre prison gang indoctrination.

Yet as I have tried to flesh out the sharpening section of the website I realized that I couldn’t just ignore the humble sub $10 pull sharpener. These are too popular to ignore. I had to buy one, and try one, and face all of my fears and skepticism about this style of sharpener.

If anything I needed to do this in order to tell you that the Pocket Pal is total crap. That these kinds of sharpeners don’t work. That I was right. But maybe I was wrong.

What You Get

This kind of sharpener is sold by many different manufacturers. Lansky offers their similar BladeMedic, and they make even smaller keychain versions, but this Smith’s model is arguably the most popular.

Smith's Pocket Pal Open

The PP1 features 2 sets of pull through sharpeners, the coarse carbide sharpener, and the “fine” ceramic sharpener. There is also a tapered diamond impregnated rod sharpener. This is for sharpening serrations or possibly freehand sharpening.

Testing

To test out the PP1 I pulled out some of my least expensive knives. There is no way I was going to put one of my $50+ folders on this thing. I reached for a well worn Alox Cadet and my Ka-Bar Dozier Hunter. These are both pretty beat up, feature soft steel, and retail for around $20. I was OK with potentially sacrificing them to the sharpening gods.

Smith's Pocket Pal Testing

I dulled these knives by dragging them along one of the stones on my SharpMaker. It took a few passes, but I was able to dull the blades to the point where they would not cut paper.

I then attempted to breathe new life into the edge of my Alox Cadet. I started on the coarse side, lightly passing the blade though the sharpener a few times. The first passes offered some resistance, but after a couple rounds I felt the blade pull through a little easier.

Smith's Pocket Pal PP1 Diamond Rod

I then turned to the fine ceramic stones. Again, I made gentle passes through the fine channel, slowly drawing the blade over the ceramic stones and using less pressure as I went along. I gave it a good 10 passes. At this point I was ready to test my results.

I actually got this knife to cleanly cut through post-it note paper using the Pocket Pal. It wasn’t quite push cutting, but it wasn’t tearing either. It wouldn’t shave hair off my arm, but it would cut open an envelope. I was surprised. I didn’t expect this thing to do much of anything, so it certainly exceeded my low expectations. I’d be curious to see what this edge looked under a microscope. Actually, I’d rather not know.

Smith's Pocket Pal Closed

After the Cadet I turned to my Ka-Bar Dozier Folding Hunter. This is a thicker blade, and it’s AUS-8 steel which is presumably a little harder than what comes on your standard SAK. Again I ran the knife through the PP1, and again I ended up with something that cut paper. The end result wasn’t incredibly sharp, but it was an improvement over the initial edge. It was completely dull before, and after a minute or so with the PP1 I could cut some things.

Finally, I sacked up and pulled out my Spyderco Sage 1. Originally, I was not going to do this. But after seeing how the Pocket Pal kinda works with soft steel, I wanted to test it out on something harder.

The Sage 1 comes in S30V. S30V isn’t the hardest steel ever, but it’s a significant step above AUS-8 and whatever Victorinox uses. It can be challenging to sharpen at times, so I thought it would be a good test. I blunted the edge of my Sage and then worked it through the coarse and fine settings on the Smith’s. The end result wasn’t as good as I was able to achieve with the Cadet or Folding Hunter. It kinda cut paper. After a few passes on my Sharpmaker fine rods I was able to get the Sage back to cleanly cutting paper. Based on my experience the Pocket Pal won’t work on harder steels.

Smith's Pocket Pal PP1 vs. Victorinox Alox Cadet

I also tried freehand sharpening a little with the diamond rod. It didn’t do much. I didn’t have any serrations to sharpen, but I’m guessing this would do something. Personally, I prefer fully serrated knives over partially serrated ones. If I have a fully serrated knife I’ll sharpen it on the Sharpmaker. That system is great for fully serrated knives.

Smith’s Pocket Pal PP1 Review – Final Thoughts

Although I am still not much of a fan of this style of knife sharpener, I have to admit that it has its place. I think if you find yourself in an emergency situation with no other sharpener, and have an inexpensive knife with relatively soft steel, then the PP1 is better than nothing. That said, I’d reach for the bottom of a coffee mug before subjecting any of my high end knives to a pull sharpener.

Smith's Pocket Pal Paper Cut

So I still am not a huge fan, but I acknowledge that for under $10 it may not hurt to have one of these tucked away in a tackle box, glove compartment, or back pack. And if you have gas station knives then who cares. Use this thing if you want to.

If you are new to knives and are looking for a quality sharpener, I would suggest the Sharpmaker. If the Sharpmaker is too expensive, then I’d choose a set of Crock Sticks (review coming soon) over the PP1. I would not recommend this as a primary sharpener or for higher end knives.

Still, the PP1 has some merit as an inexpensive field sharpener for inexpensive knives. Beyond that I would probably pass.

Smith's PP1 Pocket Pal Knife Sharpener Preset Carbide & Ceramic Stone Sharpeners Fold-Out Diamond Coated Rod Outdoor Hunting Knife & Hook Sharpener, Handheld, Compact, Lightweight, Multiuse
  • HANDHELD KNIFE SHARPENER – Smith’s “Pocket Pal” Knife Sharpener features a fold-out diamond-coated rod and preset crossed blades for easy pull-through sharpening. The preset sharpening angles provide guaranteed results on every use!
  • 2 STAGE – The pull-through coarse carbide slot provides a quick edge on dull or damaged knives & should only be used on straight edges. Fine ceramic stones provide a smooth, polished edge & can be used on serrated or standard blades.
  • DIAMOND ROD – This sharpener includes a fold-out, tapered round diamond-coated rod that is designed for sharpening serrations, standard edges, small gut hooks, & fish hooks. It is great for fishing, camping, hiking, & other outdoor survival needs.
  • PORTABLE – Smith’s portable multi-tool knife sharpener measures 3.5” long, and 1” wide, and weighs only 1 ounce. It also features a lanyard hole so it can easily be attached to a backpack or keychain ideal for any on-the-go adventure.
  • VERSATILE – The carbide and ceramic stones are reversible & replaceable for extended sharpening. Smith’s compact Pocket Pal sharpener is perfect for fishing, hunting, camping, hiking, and other outdoor survival needs.
$9.00 Amazon Prime
Buy on Amazon

I recommend purchasing the PP1 at Amazon. Please consider that purchasing anything through any of the links on this website helps support BladeReviews.com, and keeps the site going. As always, any and all support is greatly appreciated. Thank you very much.

Filed Under: Sharpening and Maintenance Products

Wiha 75992 System 4 Precision Interchangeable Bit Set Review

by Dan Jackson 6 Comments

When I was just starting out with collecting knives I was not super keen on spending money on knife maintenance stuff. I was into sharpeners and knife sharpening, but could never justify more than my Sharpmaker. This may have been a blessing in disguise as I can maintain my edges just fine with this setup, and I can freehand sharpen as well.

Wiha 85992 Bit Set Open Case

But I eventually learned that some things aren’t worth being cheap about. In my article 5 Knife Maintenance Tools Every Knife Owner Needs, I list a torx driver set as one of the tools. Specifically, I recommended the Husky 8 in 1 Torx set. You can pick this up for under $10 at Home Depot.

I found this worked for most of my needs. That is, until I stripped a screw on my Fantoni CUT Flipper. That was a $300 knife that I fucked up using a $7 tool. That’s a tough lesson to learn, and one I don’t want you, dear reader, to have to repeat.

Wiha 85992 Bit Set Closed Case

I know I’m not the only one to strip the screws on their expensive folding knives. You see knives being sold with stripped screws all the time on the forums. Sometimes you can send the knife back to the manufacturer to be fixed, but I don’t really feel like sending my CUT Flipper to Italy. The better thing to do is not strip the screw in the first place.

One way to cut down on the likelihood of stripping a screw is to buy high quality drivers. Wiha is the gold standard for micro screw drivers in the knife world, and many other worlds that value high quality tools. These are precision machined and hardened bits, and they aren’t going to warp and strip like the cheap bits you buy at the big box stores and Harbor Freight. The only problem is that by their very definition they are expensive, and Wiha makes dozens of variations of their tools. It’s going to set you back some coin, and it’s going to be hard to pick out the perfect set.

Wiha 85992 Bit Set close up of tools

I spent a couple evenings on Amazon looking over their offerings before settling on the Model 75992. In a perfect world, Wiha would make something exactly like the Husky 8 in 1, only it would be made by Wiha and sell for $25. Instead they had a bunch of different configurations that weren’t exactly what I wanted. I picked out the 75992 because it was a micro driver, had all the torx bits I needed (T3-10 plus a T15), a compact case to house everything, and then it also came with the added functionality of an extender, hex bits, Flathead bits, and Phillips bits. 9 times out of 10, my knives come with torx hardware, but it never hurts to have some precision flat head and Phillips bits, and maybe the hex bits will come in handy some day as well.

Wiha 85992 Bit Set Driver with Extension

I am keeping my set on my desk with some my other knife stuff, so I didn’t need anything ultra light or portable. This set comes with a heavy steel case, ideal for a garage or a dedicated work space. The door to the case is held in place with a couple detents. When you open it, case door folds back onto itself and creates a stand. The folding case does a nice job presenting the bits, while the plastic insert keeps everything organized and in place. So far I haven’t spilled bits all over the floor. I also like how the case closes with a satisfying snap. That is a feature most knife guys will appreciate. This heavy steel case is not something I would want to EDC (Every Day Carry), but I never EDC’d my Husky set anyways.

Wiha 85992 Driver without Extension

So far these bits have worked well. No issues with stripping hardware, and the heads of the bits haven’t deformed. Wiha uses hardened CRM-72 tool steel. I couldn’t find much info on CRM-72. Apparently it is a steel exclusive to Wiha, which makes sense if you are going to be manufacturing steel tools. Anecdotally, people say it is similar to S2 tool steel. I’d be curious to learn more about the steel and what hardness they heat treat it to. No issues with rust or corrosion either.

Wiha 85992 adjusting Spyderco Paramilitary 2

This set includes a 4″ (100mm) extender. I don’t recommend it for knives, but it’s good to have for hard to reach places in other projects. The bits are not magnetized, and neither is the handle, so it’s safe to use on and around electronics.

I spent right around $40 for my set. $40 may seem like a lot for a set of screwdriver bits, but if you have high end knives and are serious about maintaining them then this is money well spent. I bought mine for personal use and long term testing, and expect this set to last a lifetime. I’ll update the review over time if anything happens.

Also, I would be curious to see what sets other people use, and whether anyone thinks there is an “ultimate” Wiha set for knife owners. I don’t regret the 75992, but admit that a set including hex, Phillips, and Flathead drivers is probably overkill if you are only buying these tools to maintain pocket knives.

Wiha 75992 System 4 Precision Interchangeable Bit Set, Torx, Slotted, Phillips, Hex Inch, ESD Safe Precision Handle, 27 Piece In Compact Box
  • Micro Precision Bits on 4mm Hex Drive
  • Hardened for Extreme Durability
  • Bits of Exclusive CRM-72 Tool Steel
  • Choose ESD Safe or Standard Handle
  • Handle uses Ball Retainer Not magnetic
$42.87 Amazon Prime
Buy on Amazon

I recommend purchasing the Wiha 85992 at Amazon. Please consider that purchasing anything through any of the links on this website helps support BladeReviews.com, and keeps the site going. As always, any and all support is greatly appreciated. Thank you very much.

Filed Under: Sharpening and Maintenance Products Tagged With: made in Germany

Work Sharp Blade Grinding Attachment Review

by Chad McBroom 9 Comments

A while back, I wrote a review of the Work Sharp Ken Onion Edition electric sharpener. I was very impressed with the performance of WKSTS-KO, even after much reservation. What really drew my attention to the Ken Onion Edition, however, were the additional features and upgrades available for that system, in particular the Blade Grinding Attachment. As a recent student of forging and knife-making, I was fascinated with the idea of a compact, portable sharpening system that functioned in a manner similar to the large-scale knife grinders used in custom knife shops. It only made sense that I should investigate the full potential of this system and write this follow-up review.

Work Sharp Blade Grinding Attachment
Buy the Work Sharp Blade Grinding Attachment at BladeHQ

Buy on Amazon

What You Get

The Blade Grinding Attachment is constructed using cast metal and engineered polymer components. The attachment comes equipped with a Bench Mounting Tab, Adjustable Angle Indicator ranging from 10 to 35 degrees, Angle Adjustment Lever and Selection Clamp, Short and Long Distance Pulley Centers, Reference Plate, Belt Tensioner, 90° Grind Plate, and five 1” x 18” abrasive belts (Extra Course, Coarse, Medium, Fine, and Extra Fine). The Blade Grinding Attachment also comes packaged with a detailed user’s guide which illustrates installation, set up, and recommended sharpening techniques.

Work Sharp Blade Grinding Attachment

Use

The Blade Grinding Attachment is quick and easy to install on the Ken Onion Edition by simply aligning the chassis to the keyed “on/off” position with the power platform and then rotating into the “sharpening position.” Install the hub fastener onto the drive shaft by turning it in a counter-clockwise direction and the unit is ready for set up based on the desired task and sharpening angle.

To set up the tool, begin by selecting either a long or short distance center location for the adjustable pulley based on your personal preference. These center locations change the distance between the two pulleys where sharpening is conducted. The short center is intended for straight blades and produces a flatter grind, and the long center is intended for curved blades and produces a more convex grind. The change in the grind is a result of the amount of slack in the belt between the pulleys. I like a convex edge for most applications, so I just keep the pulleys set at the long center location.

Work Sharp Blade Grinding Attachment in Use 1

Next, set the tensioner into the locked position and select the desired sharpening angle by moving the angle adjustment lever to align the angle indicator with the proper angle setting. Tighten the angle selection clamp knob to secure the angle. Choose and mount an abrasive belt based on the task at hand. (The user’s guide gives a detailed breakdown of each belt grit and their uses, which range from blade repair and grinding to stropping.) The belt is easily installed by placing it around the hub fastener, pulleys, and tensioner. The tensioner is released once the belt is in place.

Grinding Belt in Use

Prior to sharpening, check to ensure the belt is tracking properly. The belt should be centered on the pulleys as it rotates. To test the belt, turn the power on to medium speed and press the switch lockout button and adjust the tracking knob until the belt is in the proper location.

Work Sharp Blade Grinding Attachment angle adjustment

Now you are ready to begin sharpening. Use the reference plate to establish your 90° baseline by placing the spine of the blade flat onto the plate. Keeping the blade at that 90 degrees, move it up to the belt surface between the two pulleys. Place the heel of the blade edge onto the belt surface using very light pressure (the belt should only deflect about 1/16th of inch). Move the blade across the abrasive belt at a rate of 1 inch per second, following the contour of the blade, until the tip reaches the middle of the belt. Pull the blade away and repeat the process until you have raised a burr along the entire edge, counting the strokes as you go. Flip the blade around and perform the same number of strokes on the opposite side. Continue up the grit scale until your desired sharpness has been achieved.

Work Sharp Blade Grinding Attachment

Testing

After running several cheap blades through the Blade Grinding Attachment, and getting a good feel for the operation of the system, I decided I would really put the “grinding” function of the attachment to the test. I pulled out my Steel Will Censor 1310, which has a spear point with a false edge on top. I’m a big fan of double-edge knives and always wished my 1310 had a top edge.

Double Edged Steel Will Censor 1310

I installed the extra coarse P120 grit belt on the belt grinder and went to work. After several minutes of grinding, shaping, sharpening, honing, and stropping with the various belts, I had the double-edged Censor I always wanted, with a top edge that looked like it came from the factory. The blade grinding attachment did its job well beyond my expectations.

A couple of sharpening tips for using the Blade Grinding Attachment that I learned through my own experience:

  1. Covering portions of the blade with masking tape, especially the areas close to the heel of the edge, will protect those areas from scratching during sharpening.
  2. Keep a small bucket of water close by if you are going to be doing heavy grinding, so you can cool the steel and avoid removing the tempering.
  3. Conduct your sharpening, honing, and stropping at slower to medium speeds. Stropping at a slower speed will produce a mirror finish if you progress up the grits properly.
  4. There are some after-market leather stropping belts available, but after testing those out I found that the 12,000 grit, extra fine belt that comes with the attachment produces the best results.

Work Sharp Blade Grinding Attachment — Final Thoughts

I was pleasantly pleased with the Ken Onion Edition, as expressed in my review of that unit, but after using the Blade Grinding Attachment, I am sold on this sharpening system. I love the amount of control I have over my sharpening and the consistent convex edge I am able to produce on everything from kitchen knives to machetes. This attachment turns a good sharpening system into a phenomenal one. Knife makers and knife enthusiasts will love the Ken Onion Edition with the Blade Grinding Attachment. In fact, I recently recommended this system to a large custom knife shop looking for a precision sharpener for finishing their blades.

If you are looking for the most versatile, user-friendly sharpening system on the planet, I believe the Work Sharp Ken Onion Edition with Blade Grinding Attachment is what you are looking for. Now if you will excuse me, I need to find some more sharp objects to sharpen.

Work Sharp Blade Grinder Attachment for Ken Onion Edition MK.1 Knife and Tool Sharpener (WSSAKO81112)
  • Attachment only, requires the Work Sharp Ken Onion MK.1 Edition Sharpener for Use. Is not compatible for the Ken Onion MK.2
  • This 4 pulley attachment is adjustable to sharpen knives and tools from 10 Degree to 35 Degree and includes fiveer (5) 1" x 18" engineered abrasive belts in a wide range of grits
  • This attachment is similar to what blade makers use. Provides a wide range of adjustability, you can custom shape, sharpen and hone your blades at home
  • The belt speed is adjustable from 1200 SFM to 2800 SFM to accommodate a wide range of sharpening and honing tasks
  • The Blade Grinder attachment provides a full selection of 1" x 18" abrasive grit belts and also accepts an optional high density cotton belt for power stropping
$79.95 Amazon Prime
Buy on Amazon

If you are considering buying a Work Sharp Blade Grinding Attachment, I recommend purchasing it at Amazon or BladeHQ. By purchasing things through any of the links on this website you support BladeReviews.com, and help produce future reviews. Thank you very much.

Filed Under: Sharpening and Maintenance Products Tagged With: Ken Onion

  • Page 1
  • Page 2
  • Go to Next Page »

Primary Sidebar

Follow Us on FacebookFollow Us on TwitterFollow Us on YouTubeFollow Us on RSS

Subscribe to Email Updates and Never Miss a Review (No Spam)!

Enter your email address:

Delivered by FeedBurner

Shop BladeHQ

Shop Outdoor Gear on Amazon

Shop KniveShipFree.com

Search BladeReviews:

Best of BladeReviews:

Best EDC Knives
Best Survival Knives
Best Tactical Knives
Best High Value Knives

Copyright © 2025 · Log in