This post contains affiliate links. We may get paid an affiliate commission if you buy something or take an action after clicking one of the links on this web page.
A while back, I wrote a review of the Work Sharp Ken Onion Edition electric sharpener. I was very impressed with the performance of WKSTS-KO, even after much reservation. What really drew my attention to the Ken Onion Edition, however, were the additional features and upgrades available for that system, in particular the Blade Grinding Attachment. As a recent student of forging and knife-making, I was fascinated with the idea of a compact, portable sharpening system that functioned in a manner similar to the large-scale knife grinders used in custom knife shops. It only made sense that I should investigate the full potential of this system and write this follow-up review.
Buy the Work Sharp Blade Grinding Attachment at BladeHQ
What You Get
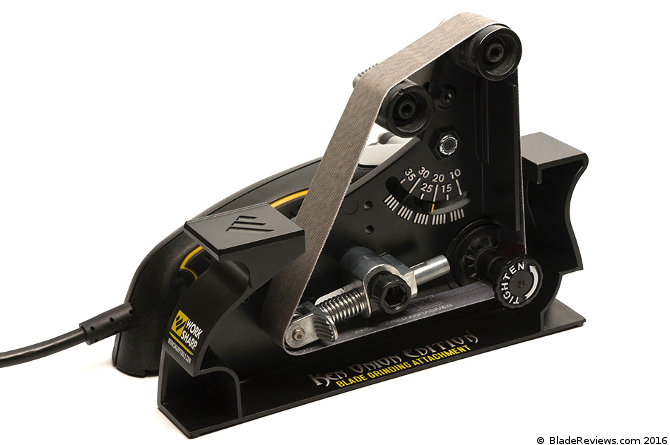
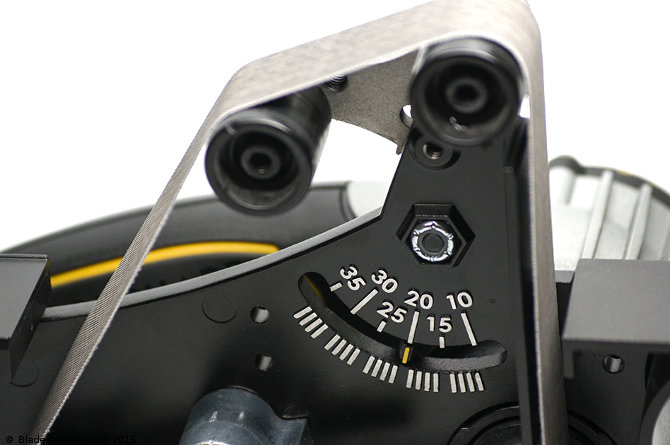
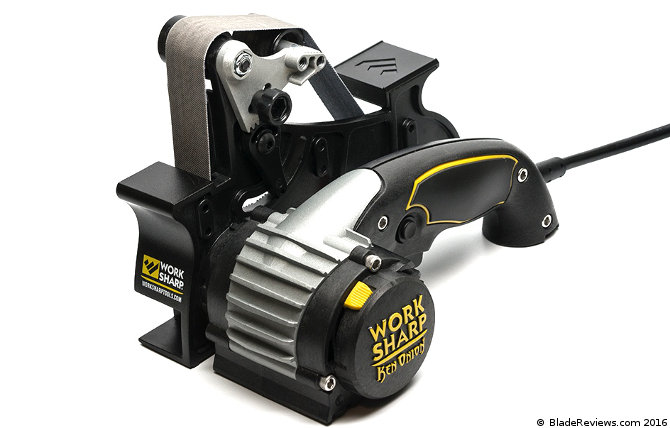
The Blade Grinding Attachment is constructed using cast metal and engineered polymer components. The attachment comes equipped with a Bench Mounting Tab, Adjustable Angle Indicator ranging from 10 to 35 degrees, Angle Adjustment Lever and Selection Clamp, Short and Long Distance Pulley Centers, Reference Plate, Belt Tensioner, 90° Grind Plate, and five 1” x 18” abrasive belts (Extra Course, Coarse, Medium, Fine, and Extra Fine). The Blade Grinding Attachment also comes packaged with a detailed user’s guide which illustrates installation, set up, and recommended sharpening techniques.
Use
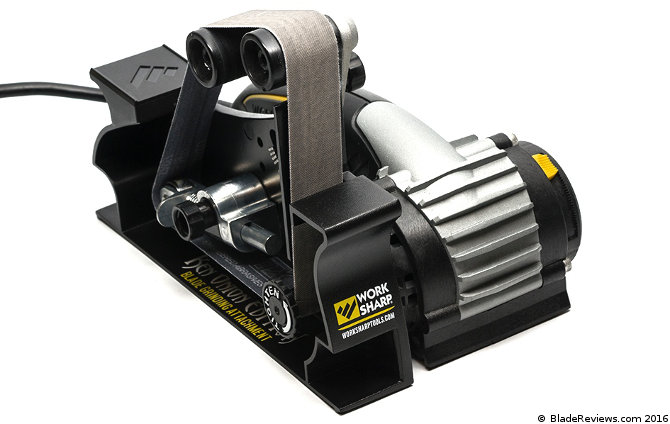
The Blade Grinding Attachment is quick and easy to install on the Ken Onion Edition by simply aligning the chassis to the keyed “on/off” position with the power platform and then rotating into the “sharpening position.” Install the hub fastener onto the drive shaft by turning it in a counter-clockwise direction and the unit is ready for set up based on the desired task and sharpening angle.
To set up the tool, begin by selecting either a long or short distance center location for the adjustable pulley based on your personal preference. These center locations change the distance between the two pulleys where sharpening is conducted. The short center is intended for straight blades and produces a flatter grind, and the long center is intended for curved blades and produces a more convex grind. The change in the grind is a result of the amount of slack in the belt between the pulleys. I like a convex edge for most applications, so I just keep the pulleys set at the long center location.
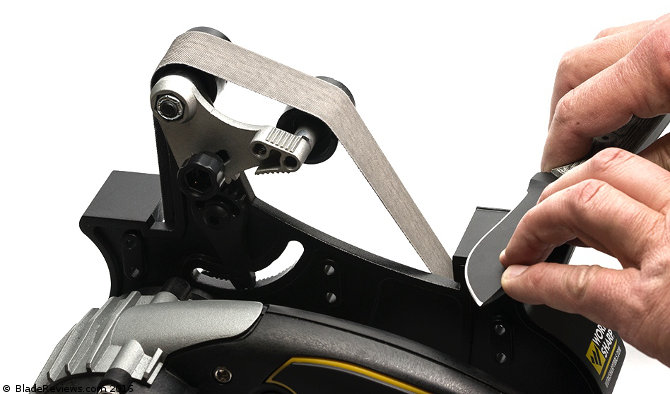
Next, set the tensioner into the locked position and select the desired sharpening angle by moving the angle adjustment lever to align the angle indicator with the proper angle setting. Tighten the angle selection clamp knob to secure the angle. Choose and mount an abrasive belt based on the task at hand. (The user’s guide gives a detailed breakdown of each belt grit and their uses, which range from blade repair and grinding to stropping.) The belt is easily installed by placing it around the hub fastener, pulleys, and tensioner. The tensioner is released once the belt is in place.
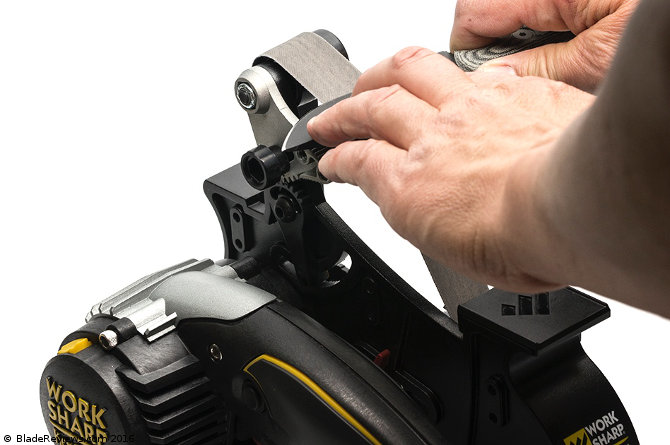
Prior to sharpening, check to ensure the belt is tracking properly. The belt should be centered on the pulleys as it rotates. To test the belt, turn the power on to medium speed and press the switch lockout button and adjust the tracking knob until the belt is in the proper location.
Now you are ready to begin sharpening. Use the reference plate to establish your 90° baseline by placing the spine of the blade flat onto the plate. Keeping the blade at that 90 degrees, move it up to the belt surface between the two pulleys. Place the heel of the blade edge onto the belt surface using very light pressure (the belt should only deflect about 1/16th of inch). Move the blade across the abrasive belt at a rate of 1 inch per second, following the contour of the blade, until the tip reaches the middle of the belt. Pull the blade away and repeat the process until you have raised a burr along the entire edge, counting the strokes as you go. Flip the blade around and perform the same number of strokes on the opposite side. Continue up the grit scale until your desired sharpness has been achieved.
Testing
After running several cheap blades through the Blade Grinding Attachment, and getting a good feel for the operation of the system, I decided I would really put the “grinding” function of the attachment to the test. I pulled out my Steel Will Censor 1310, which has a spear point with a false edge on top. I’m a big fan of double-edge knives and always wished my 1310 had a top edge.
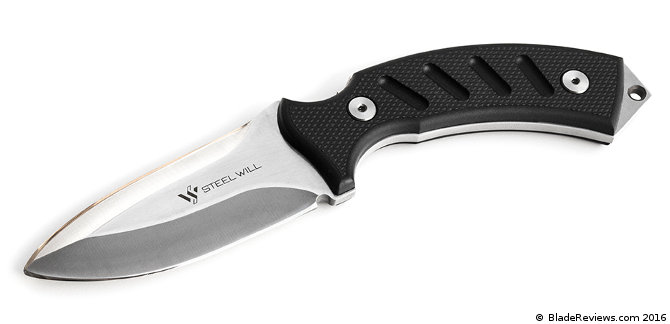
I installed the extra coarse P120 grit belt on the belt grinder and went to work. After several minutes of grinding, shaping, sharpening, honing, and stropping with the various belts, I had the double-edged Censor I always wanted, with a top edge that looked like it came from the factory. The blade grinding attachment did its job well beyond my expectations.
A couple of sharpening tips for using the Blade Grinding Attachment that I learned through my own experience:
- Covering portions of the blade with masking tape, especially the areas close to the heel of the edge, will protect those areas from scratching during sharpening.
- Keep a small bucket of water close by if you are going to be doing heavy grinding, so you can cool the steel and avoid removing the tempering.
- Conduct your sharpening, honing, and stropping at slower to medium speeds. Stropping at a slower speed will produce a mirror finish if you progress up the grits properly.
- There are some after-market leather stropping belts available, but after testing those out I found that the 12,000 grit, extra fine belt that comes with the attachment produces the best results.
Work Sharp Blade Grinding Attachment — Final Thoughts
I was pleasantly pleased with the Ken Onion Edition, as expressed in my review of that unit, but after using the Blade Grinding Attachment, I am sold on this sharpening system. I love the amount of control I have over my sharpening and the consistent convex edge I am able to produce on everything from kitchen knives to machetes. This attachment turns a good sharpening system into a phenomenal one. Knife makers and knife enthusiasts will love the Ken Onion Edition with the Blade Grinding Attachment. In fact, I recently recommended this system to a large custom knife shop looking for a precision sharpener for finishing their blades.
If you are looking for the most versatile, user-friendly sharpening system on the planet, I believe the Work Sharp Ken Onion Edition with Blade Grinding Attachment is what you are looking for. Now if you will excuse me, I need to find some more sharp objects to sharpen.
- Attachment only, requires the Work Sharp Ken Onion MK.1 Edition Sharpener for Use. Is not compatible for the Ken Onion MK.2
- This 4 pulley attachment is adjustable to sharpen knives and tools from 10 Degree to 35 Degree and includes fiveer (5) 1" x 18" engineered abrasive belts in a wide range of grits
- This attachment is similar to what blade makers use. Provides a wide range of adjustability, you can custom shape, sharpen and hone your blades at home
- The belt speed is adjustable from 1200 SFM to 2800 SFM to accommodate a wide range of sharpening and honing tasks
- The Blade Grinder attachment provides a full selection of 1" x 18" abrasive grit belts and also accepts an optional high density cotton belt for power stropping
If you are considering buying a Work Sharp Blade Grinding Attachment, I recommend purchasing it at Amazon or BladeHQ. By purchasing things through any of the links on this website you support BladeReviews.com, and help produce future reviews. Thank you very much.

No offense, but posting a photo of a knife sharpened on the system in question with the tip totally rounded may give the impression that the damage occurred as a result of using this system. This is one of the big risks of slack belt sharpening, and it probably should have been addressed somewhere in here (unless it was rounded off through other means).
David,
The tip isn’t rounded off. It just looks that way because of the grinds on that particular knife. The spread head design of the Censor is already very round and meets the false edge at a weird angle, so it’s a little deceptive the way the edges meet.
Hi David,
As always, I appreciate your candid feedback and willingness to start a discussion.
I just wanted to mention that Chad did discuss the potential to round off the tip of a knife in his original WSKOE review. I agree that is an important point and potential detractor to a system like this. You definitely want to start with cheap beater knives and really get a feel for how things work before putting a premium knife on the belt. Thanks again.
Dan
Hello I was just curious have you seen the work sharp elite? seems to be the power station plus”upgraded” grinding attachment only …for 199 do you think it’s better ?? or just the separate ko edition plus the grinting attachment?…thanks Ed
The Elite is the Ken Onion Edition motor with the Blade Grinding Attachment, so it is the same setup you see in this review. If you don’t already own the KO Edition, then I would by the Elite to get the entire setup. I never use the standard attachment.
A bit late here but just join in to share what the blade attachment can do. You can literally make a new knife by using the attachment other than just sharpening. If you have a metal file lying around try to turn it into a knife. It can be done, just takes time.
While commenting about belt alignment every image you show reveals that the belt is way off it’s proper alignment .
I have recently acquired this same system. Yes, the belts seem a little off center in the pics. This can easily be adjusted with the “tracking knob” located on the attachment while the belt is running as described in the instructions…………….best regards
I have the Elite system and concerned about the grinding attachment not locking into place. Is there something I’m doing wrong?