This post contains affiliate links. We may get paid an affiliate commission if you buy something or take an action after clicking one of the links on this web page.
Last Updated: August 5, 2019
If you are a knife enthusiast, then you know the importance of keeping your blade sharp; however, this is not always an easy task. Unless you are highly skilled at maintaining a consistent angle and have a good understanding of the interaction between steel and stone, sharpening and honing your blade can become frustrating. I would venture to say that most knife owners would rather send their knife back to the factory or just buy a new knife altogether than try their hand at sharpening. Those of us that insist on doing it ourselves will typically spend hundreds of dollars trying to find a sharpening system that produces our desired results.
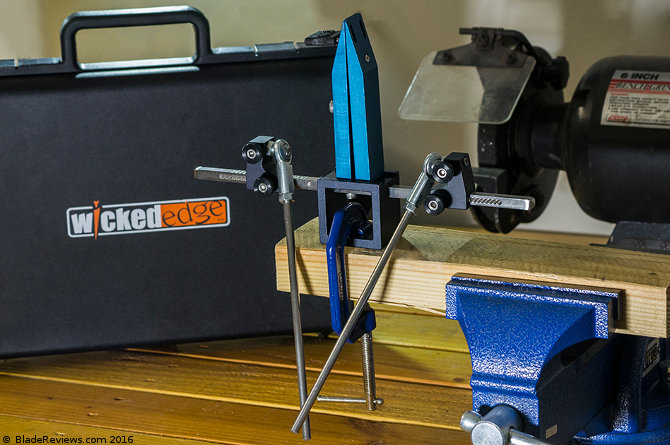
Buy the Wicked Edge Field & Sport at BladeHQ
To make things easier for the common man, many companies have begun producing guided angle sharpeners to help people maintain a consistent angle while sharpening and honing. There are a number of these types of systems currently on the market, but those of you that follow my knife reviews here on BladeReviews.com and Black Sheep Warrior, know that I am a big fan of the Wicked Edge Precision Sharpener, which I use almost exclusively. I would have to say that the biggest downside of my Wicked Edge system is its lack of portability, which has forced me to rely on more compact systems like the Spyderco Sharpmaker for field use.
Well, I am happy to say that that has changed thanks to the the Wicked Edge Field & Sport.
What You Get
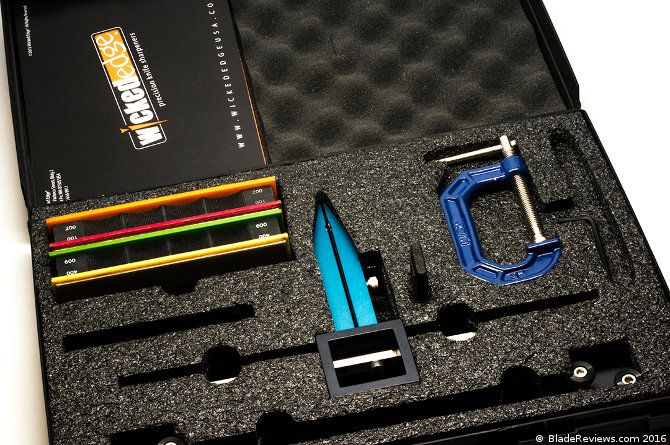
The Wicked Edge Field & Sport model is a portable version of the Wicked Edge Precision Sharpener with their Pro-Pack II hardware. The kit comes with a mounting vise, depth key, a variable angle degree bar, two guide arms with upgraded Pro Pack II ball joints and micro adjustable L-brackets, eight diamond sharpening stones (two of each in 100, 200, 400, and 600 grit), a mounting clamp, and a detailed instruction guide. All of these items fit conveniently into a light-weight carrying case with customized foam inserts so that every piece has its own little home.
Use
If you have never used a Wicked Edge system before, then it might be a bit intimidating at first. There is definitely a learning curve involved here, but the great thing about Wicked Edge is that they have a ton of resources on their website to help you learn how to run your system to its fullest potential. The Field & Sport works like any other Wicked Edge system when it comes to setting your angle and working the stones, but to give you the reader a good grasp on how this system works, I will walk through step by step from setup to finish.
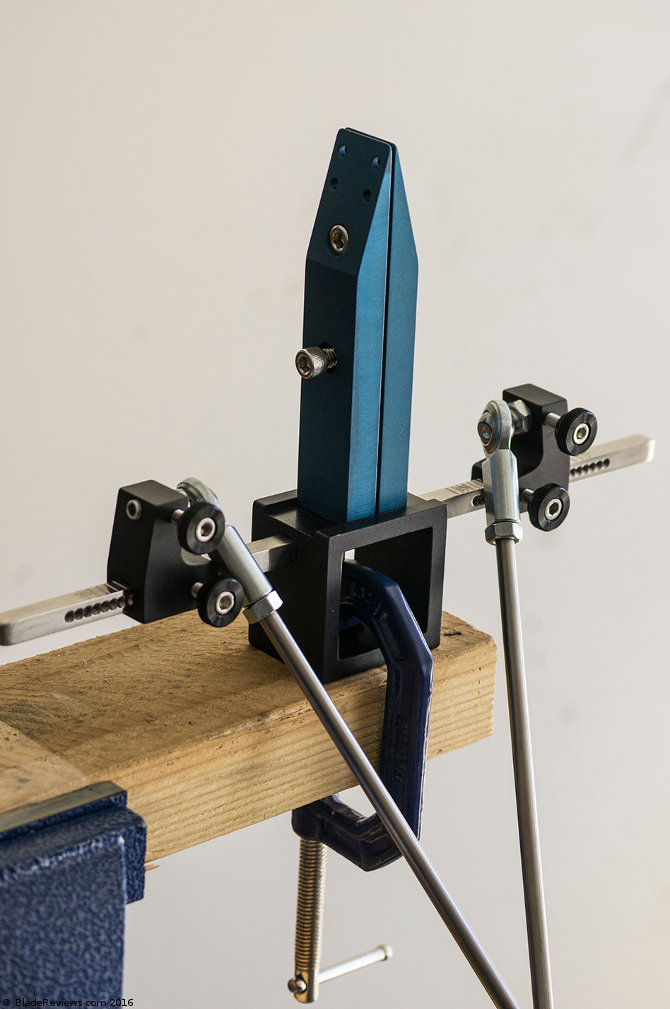
You begin by mounting the sharpener to a hard, stable surface using the provided C-clamp mount. A work bench or picnic table is a good option. My work bench was too thick, so for testing purposes, I mounted the sharpener to a piece of 2×4 that I clamped into a bench vise. The sharpener should be mounted so that the numbers on the degree bar are right side up. The L-brackets of the guide rods are then attached to the degree bar with the ball joints facing inward towards the mounting vise.
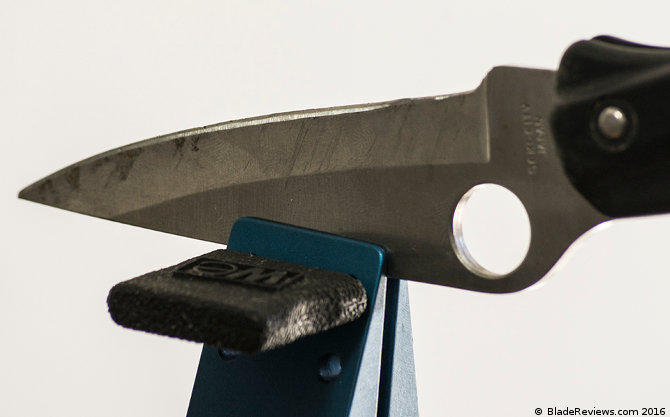
Next, loosen the top screw of the vise enough that the knife you are going to sharpen will fit between the vise jaws. Insert the depth key from the left side into one of the sets of holes, using the top holes for smaller knives and the bottom holes for larger knives. Insert the blade into the vise with the tip facing away from you. The blade should be approximately centered from front to back and the spine should be setting against both prongs of the depth key.
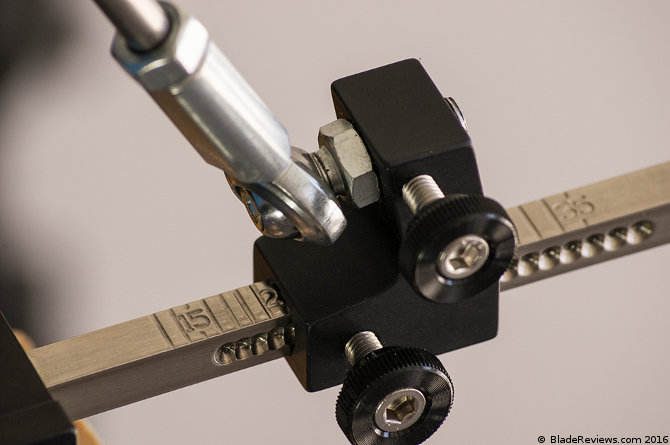
One thing to note about the depth key is that the right side of the vise has elongated cutouts instead of the two sets of holes like the left side. When using the top setting, I have found that it is important to apply and maintain downward pressure on the left side of the key to get a consistent setting. Once the blade is positioned, tighten the top vise screw using the provided allen wrench, then tighten the bottom screw, being careful not to over tighten.
Now that the knife is mounted in the vise, it is time to set the sharpening angle. The easiest way to set your angle is to match the existing edge angle. Using the Sharpie technique is the easiest way to determine the bevel angle. Color the entire bevel on both sides using a Sharpie marker. Using a fine grit stone, lightly rub the edge to test the angle setting. The angle setting is correct when the marker is removed evenly from the entire bevel. If marker is removed from the top, but not the bottom, then the angle is too wide. If it is removed from the bottom, but not the top, then the angle is too narrow.
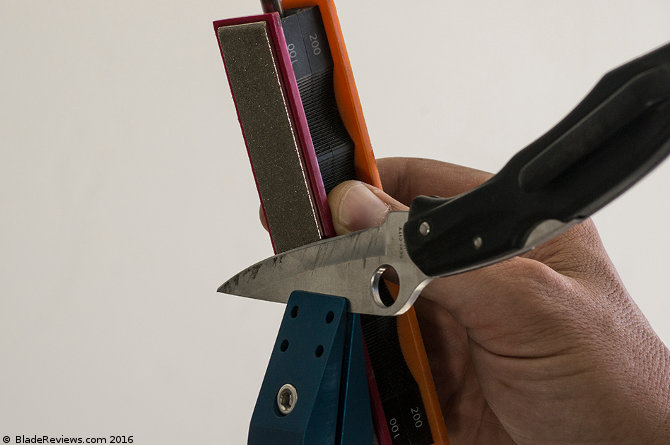
The next step is finding the “sweet spot,” which is where the knife needs to be position in the clamp to get a consistent bevel throughout the the length of the blade. This can be done using the Sharpie technique again. If marker is removed from the edge at the heel and the shoulder at the tip, then the knife is too far forward in the vise. If marker is removed from the shoulder at the heel and the edge at the tip, then the knife is too far back. The knife is correctly positioned when marker is removed parallel to the edge and shoulder along the entire length of the blade.
Once your angles are set and you have located the sweet spot, then you can begin sharpening. There are several techniques you can use with the stones, but for the new user the best method is to start at the heel and slide the stone up and away along the entire bevel so that the stroke is completed when the bottom of the stone reaches the tip of the knife. Work from coarse to finer grits until reaching the desired level of sharpness.
Testing
For the purpose of this review, I sharpened an old Spyderco Endura that I have had for years. When I originally purchased this knife, it had a fully serrated edge, but after years of hard use those serrations became quite worn down and damaged to the point where I eventually removed them. The knife never really had a decent edge on it after that, though.
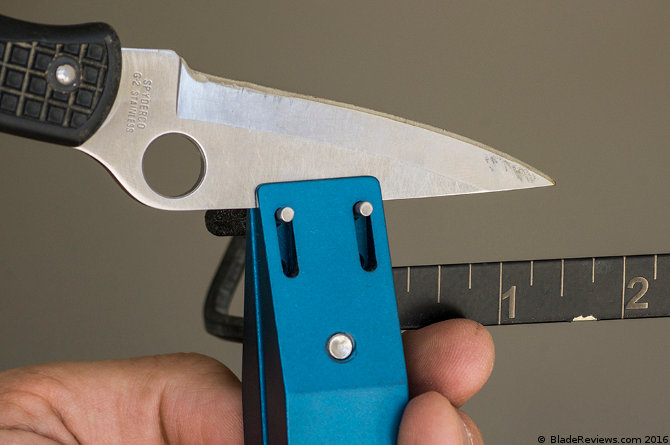
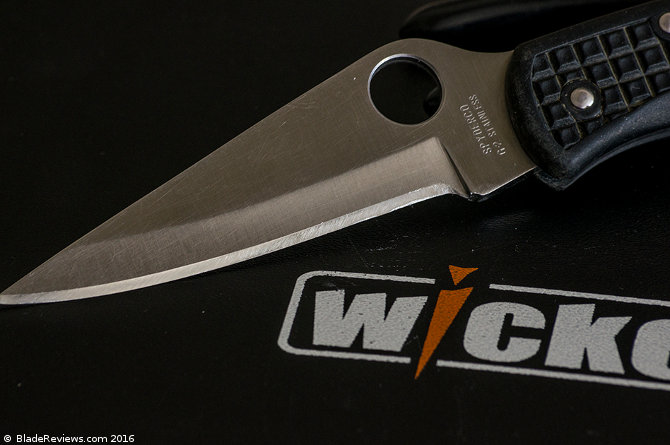
I went to work on it with the Field & Sport and within about 20 minutes, I had a nice, razor-sharp bevel that would slice through paper with ease. There was one spot on the shoulder that I had to touch up after taking the photo shown here. This was the result of going too deep with a grinder in one spot when removing the serrations, which caused this section of the bevel to be off from the rest. Fixing it required a little more elbow grease and the use of my 50 grit diamond stones to remove quite a bit more steel. Not something you would normally have to deal with when sharpening a knife.
Upgrades
The Field & Sport comes with the basic stones needed to put a good working edge on your knife. Of course, if you want to re-profile a blade or hone the bevel to a beautiful, hair-splitting mirrored finish, then you will want to invest in some additional stones. Wicked Edge offers everything from 50 grit diamond stones to ceramics. They even have several specialty stones such as Japanese water stones and offer an array of leather strops and stropping compounds.
Wicked Edge Field & Sport Review — Final Thoughts
If you are looking for a high-grade, portable, angle-guided sharpener, or perhaps you have been considering the Wicked Edge Precision Sharpener but have been hesitant to fork over several hundred dollars on a knife sharpener, then the Wicked Edge Field & Sport is an excellent option. You get all the benefits of the Wicked Edge in a more economical and portable package. Of course, I can’t recommend the Wicked Edge enough as it is. It is, in my opinion, the epitome of knife sharpeners.
In closing, I would like to thank the guys at Wicked Edge for the opportunity to demo this awesome product of theirs. If you love your steel the way I do, then do yourself a favor and get one of Wicked Edge’s awesome sharpening systems. The Field & Sport is a great place to start!
I recommend purchasing the Wicked Edge Field & Sport at Amazon or BladeHQ.

The “C” clamp option in the Field and Sport Kit almost seems like a better option than the big heavy stove used on the other models. I wish for the price they would include another set of higher grit stones and cut outs in the foam case to store them.