This post contains affiliate links. We may get paid an affiliate commission if you buy something or take an action after clicking one of the links on this web page.
Last Updated: July 29, 2019
Anyone who knows me knows I am passionate about keeping my blades sharp. I am constantly looking for the best tools and techniques for putting a killer edge on a piece of steel and maintaining that edge. I have used several different sharpening systems from table stones and rods to guided-angle sharpeners. The one type of sharpener I have always avoided, however, is the electric sharpener. I have seen the results of many pull-through electric sharpeners, and to say the least, they make me cringe. It’s kind of like sticking your blade inside a garbage disposal.
After much reservation I finally decided to give a Work Sharp a try. I really wanted a system that would allow me to sharpen some of my larger blades, which includes some machetes, kukris, and tomahawks. After watching a contestant on the show Forged in Fire use a Work Sharp to do some finishing work on a cutlass, I decided it might be worth my time to give the system a test run. I chose to go with the Ken Onion Edition because of the additional features and attachment options not found on the standard model. Plus, I figured Ken Onion wouldn’t put his name on anything unless it was worthwhile.
What You Get
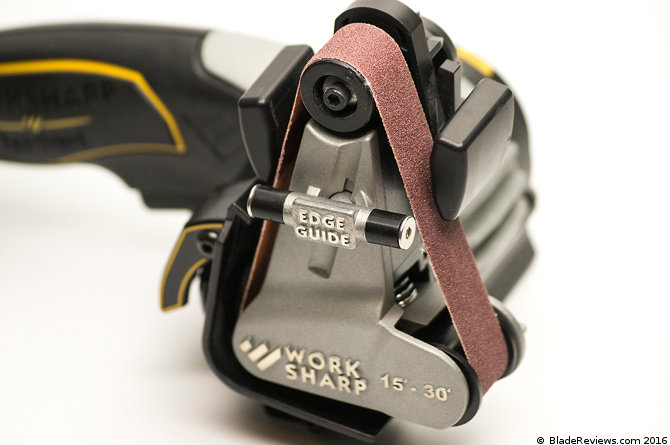
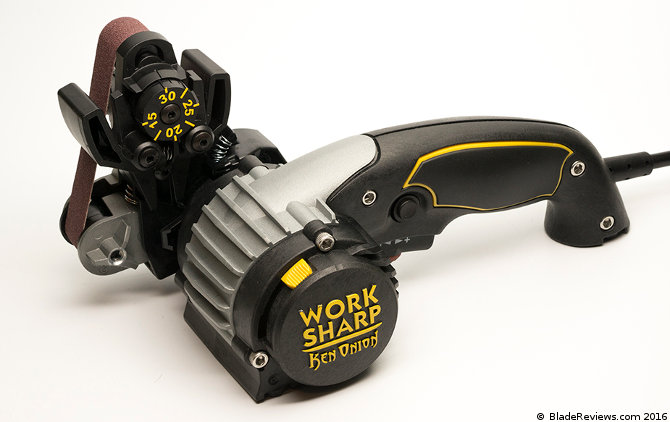
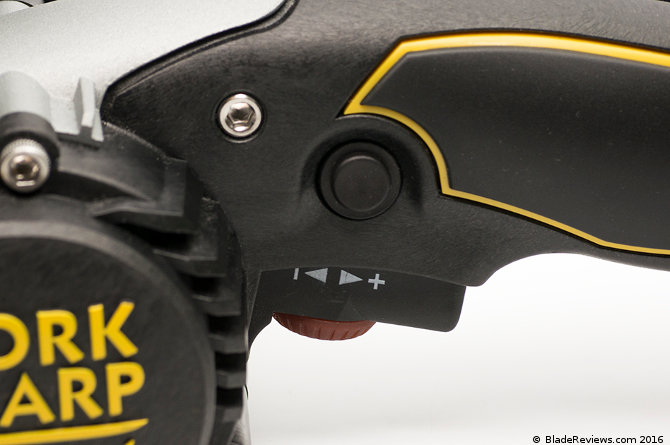
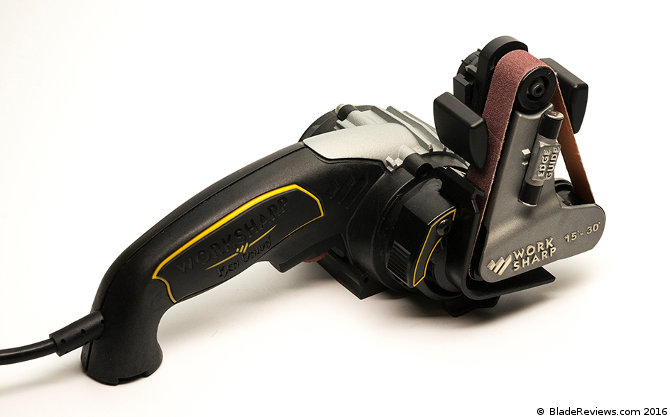
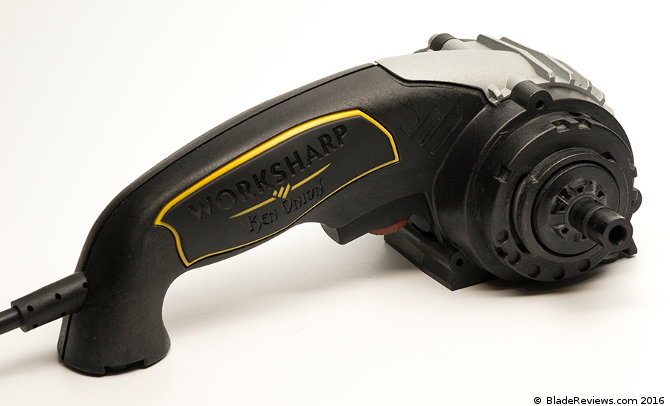
The Ken Onion Edition comes with the Work Sharp Ken Onion Power Platform equipped with a variable speed Power Switch, Power Switch Lockout, Sharpening Cassette with Edge Guide, removable Sharpening Guide with angle adjustment, and five abrasive belts (Extra Course, Coarse, Medium, Fine, and Extra Fine). The Ken Onion Edition also comes packaged with a detailed user’s guide and instructional DVD to guide you through the process of setting up and using your sharpener to the fullest, as well as a quick-reference card to hang in your shop.
Use
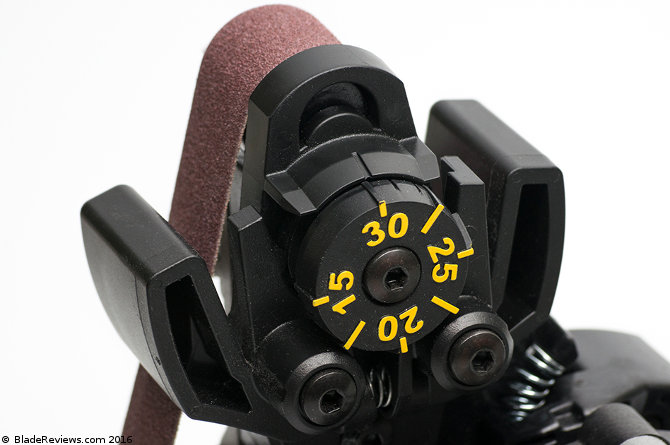
Setting up the Work Sharp for use is quick and easy. It is really just a matter of plugging the system in, choosing the appropriate abrasive belt, and selecting the sharpening angle. The belts can be easily swapped out by simply lifting the belt changing lever, sliding the belt on or off, and releasing the lever. The sharpening angle is set by turning the Angle Adjustment Knob located on the Sharpening Guide and aligning the desired angle with the indicator line at the top of the guide. The Angle Adjustment Knob is marked from 15 degrees to 30 degrees in 1-degree increments, offering a wide range of angle selections.
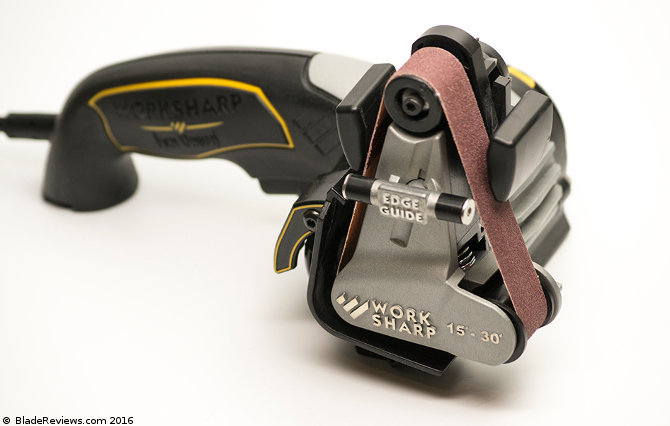
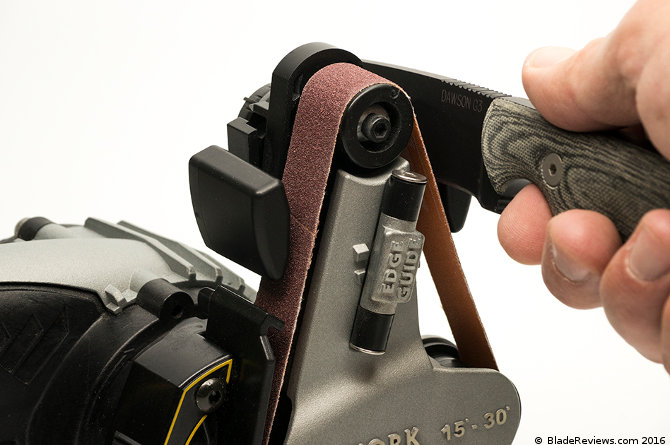
Once the angle is set and the desired belt installed, you are ready to begin sharpening. Beginning with the power off, insert the blade into the right side of the Sharpening Guide at the heel of the bevel. Squeeze the Power Switch and simultaneously pull the blade through the guide at a rate of one inch per second, following the curve of the blade and keeping the edge perpendicular to the belt. Be sure to use only the weight of the blade against the belt. Do not press down into the guide. Release the Power Switch and stop the pull when the tip of the blade reaches the center of the belt to avoid rounding the tip.
Repeat the process described here on the same side until you develop a burr, then repeat the same number of strokes on the other side. Once you have shaped the secondary bevel, you can progress with finer grit belts using alternating strokes. For longer blades such as kitchen knives, fillet knives, machetes, etc., the Edge Guide can be helpful to guide and support the blade during the sharpening process; however, for most field knives and pocket knives, the Edge Guide is not only unnecessary, but can actually get in the way.
The Work Sharp can also be used on serrated knives and gut hooks. Serrated knives are sharpened using the Extra-Fine belt at low speed against the non-beveled/flat side. Gut hooks can be sharpened by placing the curve of the hook over the Extra-Fine belt on the “downhill” side and honing for two to four seconds on each side. The WSKTS-KO can also be used to sharpen scissors using the built-in scissor guide. By removing the Sharpening Guide and rotating the cassette forward, the Work Sharp can be converted to grinding mode for sharpening lawnmower blades, axes, and other large blades.
Testing
I tested a number of different blades out on the WSKTS-KO. I was quite hesitant at first to try the Work Sharp on any of my quality blades, so most of the blades were either severely damaged or much too large for some of the other sharpening systems I normally use. (I do recommend starting out with some lower quality or less sentimental knives until you get comfortable with the system.) I was quite impressed with how even and precise the bevel was after running the knives through the system. Don’t get me wrong, if you don’t use proper technique, you definitely risk over-grinding the bevel, but if you pull the blade through consistently in the manner I described above, you can achieve some very impressive results.
After getting comfortable with the system I sharpened every kitchen knife and utility knife in the house. The Work Sharp works so quickly it is amazing, especially when you are accustomed to doing everything by hand. I then converted the Work Sharp over to grinding mode and went to work on several tomahawks and axes. The system worked like a champ and left me with some very sharp choppers.
Upgrades
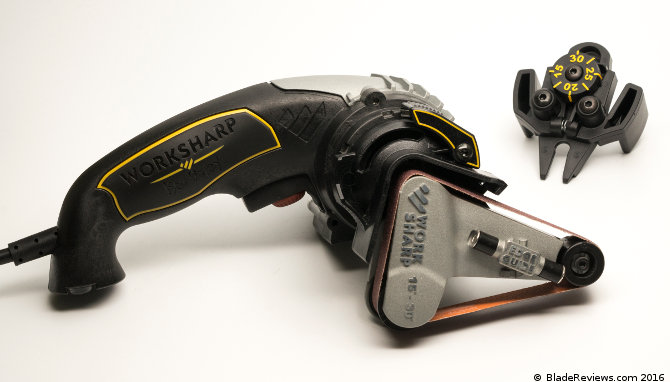
As I mentioned earlier, the Ken Onion edition has some upgraded features that make it quite an attractive piece of equipment. There is a Tool Grinding Attachment that allows for both flat platen and slack belt grinding, and can be used as a power file or handheld belt sander for working with metal, wood, and plastics. The Blade Grinding Attachment will turn the WSKTS-KO into a miniature belt grinder capable of shaping, sharpening, and honing blades. There is also a nice selection of abrasive belts available for both the cassette and the Blade Grinding Attachment, including leather stropping belts.
Work Sharp Ken Onion Edition (WSKTS-KO) Review — Final Thoughts
I was quite impressed with the WSKTS-KO, albeit to my surprise. I am still not a fan of electric sharpeners, but the Work Sharp really does not fall into that category as we know it. The Work Sharp is really a miniature grinder with the added benefit of an angle guide, and this makes all the difference. It definitely requires a certain amount of skill to use, which should not come as a surprise since this is true of any sharpening system, even the most rudimentary hand stone, but it is easy to learn and should not be feared.
One thing I have not mentioned is the benefit of the convex edge. The very nature of the Work Sharp’s slack belt system results in a convex edge, which is an edge with a smooth radius void of any shoulders like a typical flat grind. The omission of the shoulders results in less friction during cutting and more supportive steel behind the edge. It has been my personal experience that a convex edge lasts longer and cuts cleaner than a flat-ground edge. In my opinion, the resultant convex edge gives the Work Sharp a leg up over many other systems.
If you are searching for a versatile, high-quality sharpening system, then the WSKTS-KO is an item at which you should take a hard look. The reasonable price tag makes this system even harder to pass up. I am not saying the WSKTS-KO is the end all be all, but it is definitely a great system with a ton of versatility. I have a feeling that I am only going to become more fond of this system over time. In the meantime, I think I need to get that Blade Grinder Attachment and see what I can do with it.
- ADJUSTABLE SHARPENING GUIDE: Produces precise edge bevels from 15 to 30 degrees for that perfect sharpen for your knife or tool.
- VARIABLE SPEED MOTOR: Handle every sharpening task, from grinding to honing. This sharpener has more power with improved cooling and the option of slow-speed honing or high-speed grinding.
- FAST, PRECISE, & REPEATABLE: Deliver a strong, long-lasting razor-sharp convex edge with no setup or calibration time. The 6000 grit belt measures .5 x inches for better contact with serrations and other hard-to-reach edges.
- 3-YEAR WARRANTY: All Work Sharp sharpeners come with a comprehensive 3-year warranty. Each knife & tool sharpener is meticulously designed and quality-checked at our Oregon facility. We proudly stand behind our products.
- DESIGNED, ENGINEERED, & CALIBRATED IN OREGON: We design, engineer, and calibrate our sharpening machines all under one roof in Ashland, Oregon & ensure our products are sourced from the highest caliber manufacturers, both in the USA and globally.
I recommend purchasing the Work Sharp Ken Onion Edition at Amazon or BladeHQ. Please consider that purchasing anything through any of the links on this website helps support BladeReviews.com, and keeps the site going. As always, any and all support is greatly appreciated. Thank you very much.

I have a KO Worksharp and i was never able to get a decent edge on it. All I use it for is to reprofile or to repair a damaged edge. Then i actually sharpen on the Spyderco Sharpmaker.
I will say there is a little bit of an art to it.
Just to point out a typo, you referred to the Work Sharp as the Sharpmaker in the very last paragraph. Thanks for the great review, I never would have considered buying a product like this before reading this. One reason for my hesitation in buying it is that I actually enjoy sharpening knives.
I’m unclear as to how the Work Sharp would be used to sharpen the curved belly of a knife. Is this possible or would the belly lose its curve over time? Although I don’t own one, I suppose the same would apply to a knife with recurve. It’s difficult for me to visualize this not having used a Work Sharp.
Hi Christopher,
I’ll try to answer this although I am sure Chad can provide an answer. Basically, there is slack in the belt that allows for the curve. If you had a flat plate behind it you would definitely mess up the edge. The slack in the belt helps follow the curve, and you have to move the knife as well to follow the line of the edge. Hope this helps a little.
Dan
I want to confirm that this system does take some time with it to perfect. Once you do, there really is no looking back. Dulling tips is easy to do at first, so do practice on your junk knives first. After you sharpen everything in your house, you’ll be asking your friends to bring over their knives as it’s that enjoyable to use…for me anyway. I can achieve hair popping results every time, on any steel and can re-profile completely dull S30v to stunningly sharp in about 10 min or so. Touch ups on blades sharpened on this tool takes 1-2 min. There are some really useful YOU TUBE video’s on proper technique by a gentleman named Doug Holser. Follow his instructions and you’ll be good to go. I highly recommend holding on to your spent fine belts (as Doug suggests), use some jewelers rouge or bore cleaner on the belt to put a excellent mirror polish on the edge. Cheers.
Thank you very much for your review. I am an absolute beginner at sharpening knives and desperately need to get my kitchen knives back, so to speak. I understand that this system takes time to learn but am considering buying it.
I notice several comments on Amazon that say the plastic drive shaft is common point of failure. Would you mind telling me if you still stand by this unit after all this time? Thank you, again.
I find the original work sharp to do better on most knives. That being said, I like the ken onion edition for its versatility. Especially using the blade grinding attachment. It’s great for machetes, and axes. Both sharpening systems have their ups and downs.and learning curves. I personally dont have any freehand knife sharpening experience. So the Work Sharp systems are very appealing to me. Also I’m a big fan of the convex blade shape, that the belt system develops.
Hi, my name is gary and l had purchased the knife and tool sharpner, the ken onion edition. I have had it for six months but never used it. Now that l am ready to use it, brand new, l am missing the owner’s manual, including instructions. I am hopeful that someone out there would be able to help me. Thank you